Google Ad Manager
Google Ad Manager cocos guide for Custom Adapter GMA SDK.
App Prerequisites
- minSdkVersion of 26 or higher
- compileSdkVersion of 36 or higher
Ensure your android/build.gradle (project-level) includes the required repositories:
allprojects {
    repositories {
        google()
        mavenCentral()
        maven { url 'https://jitpack.io' }
    }
}
GOOGLE AD MANAGER CONFIGURATION
Please go through the below steps to integrate TapMind as a demand partner with your GAM account. To begin with the integration, login to your GAM account and follow the below steps.
- Under the Admin header : Click on the Companies section
- Click on the New Company button : Select Ad Network
- In the Name field : Type In TapMind
- In the Ad Network field : Select Other Company
- Toggle Mediation to ON
- Click on Save
Installation
Install Extension
- Open your Cocos project
- Go to the top menu: Extension → Extension Manager
- Click on: "Install from File"
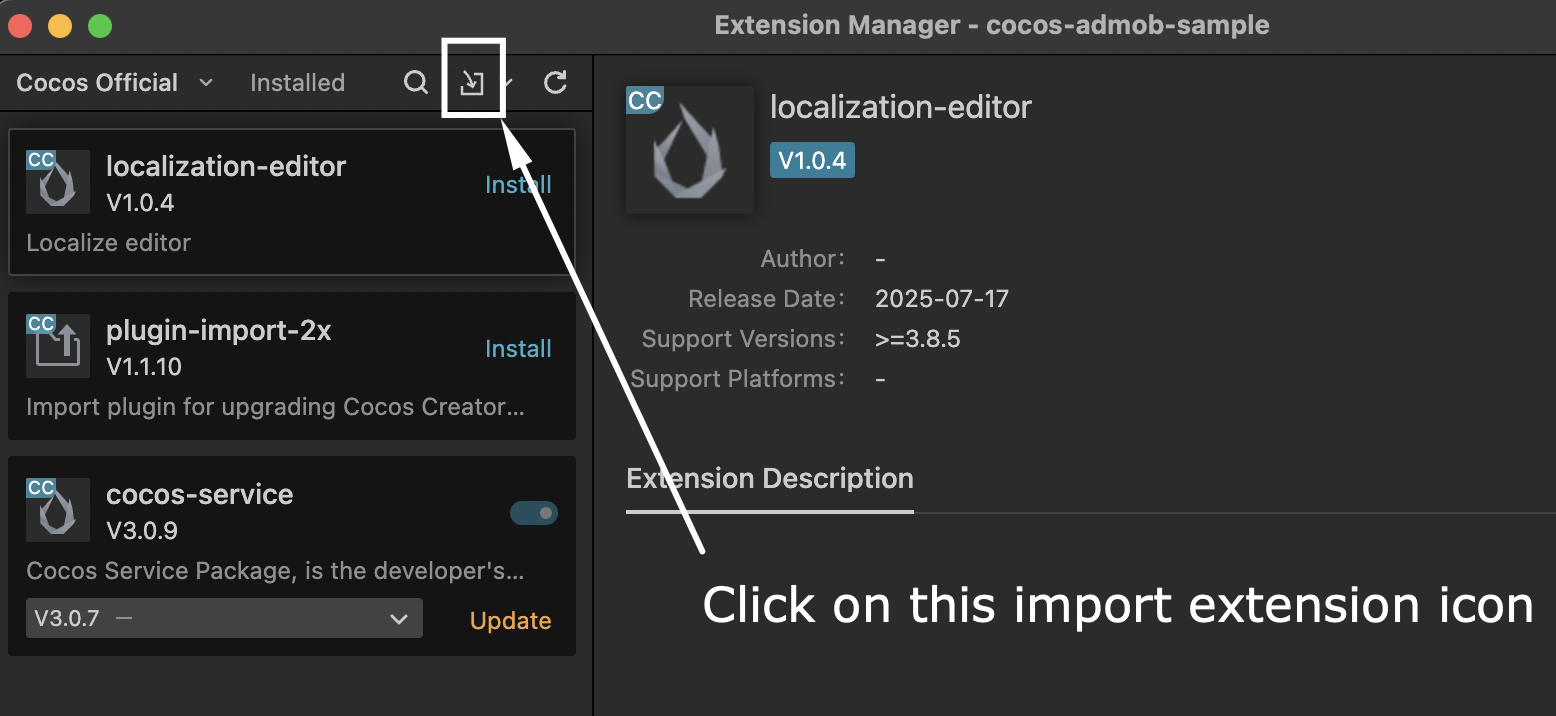
- Select and upload the TapMind extension ZIP file
Download TapMind Extension
Enable Extension (if it is disabled)
- After installation, go to the Installed tab
- Locate the TapMind extension
- Enable it
Extension → Extension Manager → Install from File → Select TapMind Extension ZIP → Install → Installed Tab → Enable Extension
Configuration
Platform-specific values The steps below apply to both Android and iOS. When copying adapter class names or platform-specific parameters, use the Android or iOS tab for your build target.
- An Ad Unit must already be in place which will be used for targeting.
GOOGLE AD MANAGER CONFIGURATION
Please go through the below steps to integrate TapMind as a demand partner with your GAM account. To begin with the integration, login to your GAM account and follow the below steps.
- Under the Admin header : Click on the Companies section
- Click on the New Company button : Select Ad Network
- In the Name field : Type In TapMind
- In the Ad Network field : Select Other Company
- Toggle Mediation to ON
- Click on Save
Login GAM → Admin → Companies → New Company → Select Company Type (Ad Network) → Enter Name (TapMind) → Select Ad Network (Other Company) → Enable Mediation → Save
CREATING YIELD GROUP AND YIELD PARTNER
For adding TapMind under existing yield groups, skip the steps for creating a new yield group, navigate to your existing yield group and follow the steps for Adding Yield Partner as described in the next section
- Under the “Delivery” tab : Click on “Yield Groups” section
- Click on “New Yield Group” to create a new yield group
- In the Name field : Type in as provided in the G-sheet
- Ad Format : As Per the G-sheet Provided
- Inventory Type : Mobile
- Under Targeting : Select the Ad Units which "TapMind" will target
- Scroll to the bottom
Delivery → Yield Groups → New Yield Group → Enter Name (from sheet) → Select Ad Format → Select Inventory Type (Mobile) → Select Ad Units (TapMind) → Scroll Down
ADDING YIELD PARTNER
- Click on “Add Yield Partner”
- Select “TapMind” from the list
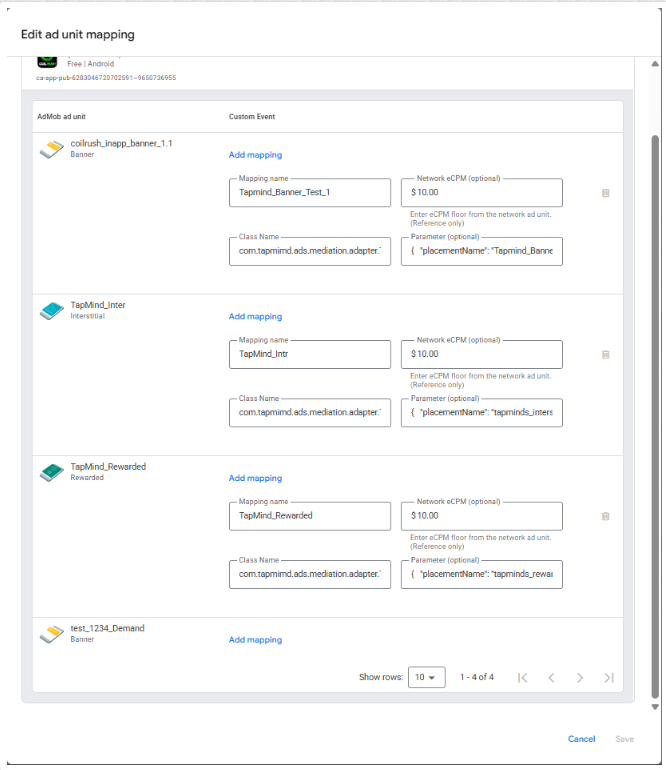
Add details as provided below in Yield Partner
Integration Type : Custom Event
Platform : Android
Status : Active
For the Below details Please reach out TapMind Account Manger
Default Cpm : As Per the G-sheet Provided
Label : As Per the G-sheet Provided
Class Name : com.tapmind.tech.TapMindMediationAdapterAdmob
Parameter : { "placementName": "As Per the G-sheet Provided" }
- Click on “Save” and save the configuration.
- The actual number of entries, manual eCPM, etc. will be shared once the test setup is complete.
The above setup completes our TapMind x GAM integration. You should see an Ad if test setup is complete and working fine.
Add Yield Partner → Select TapMind → Integration Type (Custom Event) → Platform (Android or iOS) → Set Status (Active) → Enter Default CPM (from sheet) → Enable Override CPM → Enter Label (from sheet) → Enter Class Name → Enter Parameter → Save
Response can be checked in LOGCAT by using tag: TapMindAdapter
Official Google Documentation for creating a Yield Group :
https://support.google.com/admanager/answer/7390828?hl=en